
by Luna
VITO의 STT API는 다양한 언어에서 쉽게 접근하고 활용할 수 있는 특징을 가지고 있습니다. VITO Developers 사이트에서는 주로 Java, Curl, Python 등을 통해 API의 사용 방법을 안내하고 있습니다. 이번에는 기존의 방법과는 다르게 Node.js(Express) 환경에서 파일 및 스트리밍 STT API를 활용하는 방법에 대한 튜토리얼을 소개하려 합니다.
TypeScript는 JavaScript의 슈퍼셋으로, 큰 규모의 어플리케이션 개발을 위해 탄생했습니다. 이번 튜토리얼을 통해 TypeScript를 사용한 Node.js 환경에서 VITO의 STT API를 어떻게 적용할 수 있는지 함께 알아보겠습니다.
💡
[파일 STT API]
- 음성 파일 포맷 mp4, m4a, mp3, amr, flac, wav 을 지원
- 최대 인식파일 크기: 2GB, 최대 인식가능 시간: 4시간.
[스트리밍 STT]
- gRPC, WebSocket 방식 지원
- 오디오 코덱 LINEAR16, WAV, FLAC, MULAW, ALAW, AMR, AMR_WB, OGG_OPUS, OPUS 지원
- 마이크와 같은 스트리밍 입력 장치 사용 (오디오 파일도 가능)
- 음성 파일 포맷 mp4, m4a, mp3, amr, flac, wav 을 지원
- 최대 인식파일 크기: 2GB, 최대 인식가능 시간: 4시간.
[스트리밍 STT]
- gRPC, WebSocket 방식 지원
- 오디오 코덱 LINEAR16, WAV, FLAC, MULAW, ALAW, AMR, AMR_WB, OGG_OPUS, OPUS 지원
- 마이크와 같은 스트리밍 입력 장치 사용 (오디오 파일도 가능)
음성인식 API 시작하기 | VITO STT OpenAPI
VITO STT OpenAPI는 눈으로 보는 통화 VITO를 서비스 하는 리턴제로의 우수한 음성인식 기능을 API로 제공합니다. 이 문서는 VITO STT OpenAPI의 사용법에 대하여 안내합니다.
1. 프로젝트 생성 및 패키지 설치
Node.js (Express)
# 프로젝트 생성

npm init -v
npm install express typescript @types/express
# 패키지 설치 및 실행
npm install axios form-data dotenv multer fs cors
npm install --D nodeman @types/node ts-node# tsconfig.json 생성
tsc --init// tsconfig.json
{
"compilerOptions": {
"esModuleInterop": true,
"target": "ES6",
"module": "commonjs",
"outDir": "./dist"
},
"include": ["*.ts"],
"exclude": ["node_modules"]
}
2. 인증 토큰 발급
인증 토큰 발급 방법
VITO Developers 사이트에서 회원가입 후 SECRET (client_id, client_secret) 정보를 발급 받으세요
- VITO Developers 사이트 회원가입
- 콘솔에 접속
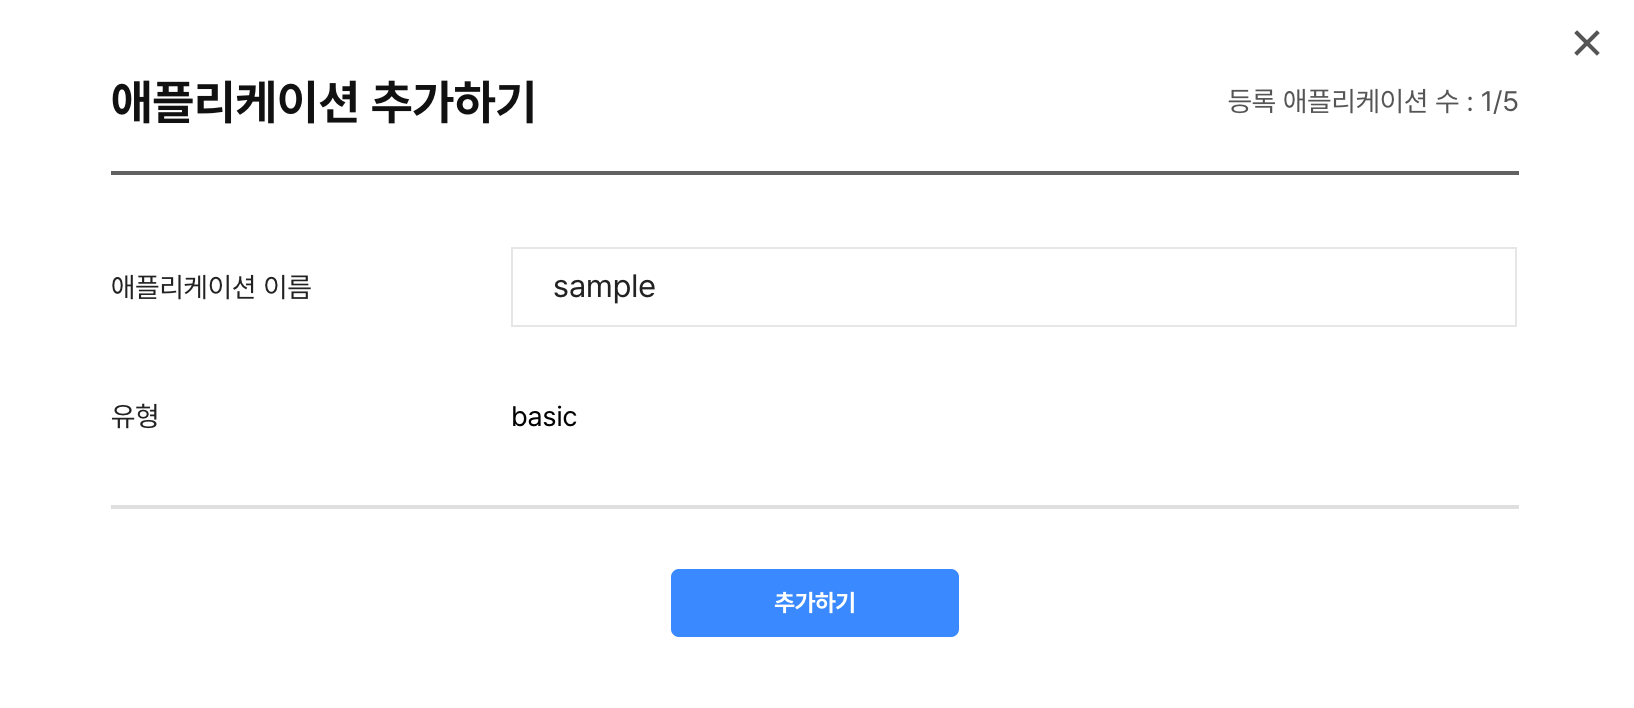
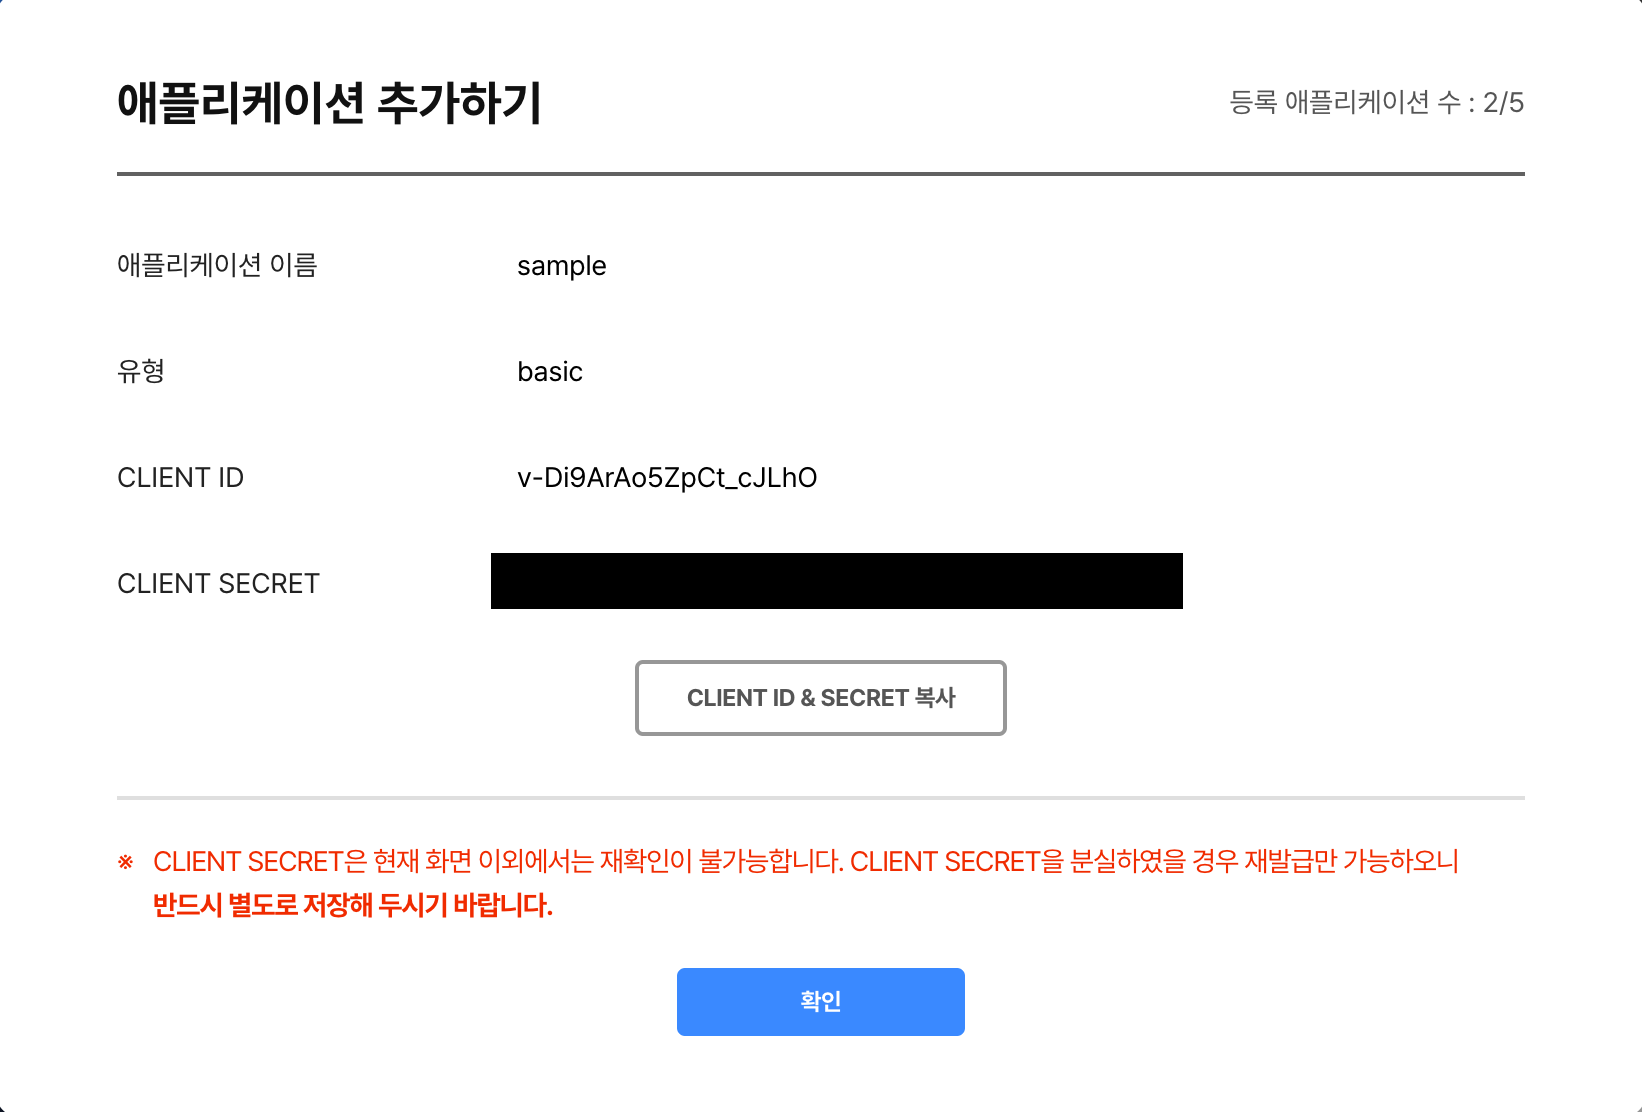
- 애플리케이션 이름 등록 후, ID와 Secret을 저장
(현재 화면에서만 Secret을 확인할 수 있으므로 반드시 별도로 저장)
서버에서 JWT 인증 토큰 요청하기
- 루트 디렉토리에
.env파일 생성 후CLIENT_ID와CLIENT_SECRET작성
# .env

CLIENT_ID="{YOUR_CLIENT_ID}"
CLIENT_SECRET="{YOUR_CLIENT_SECRET}"- 인증 토큰을 요청하는 함수 생성
// config/index.ts

import dotenv from "dotenv";

dotenv.config({ path: ".env" });

export const CLIENT_ID = process.env.CLIENT_ID;
export const CLIENT_SECRET = process.env.CLIENT_SECRET;
export const API_BASE = "https://openapi.vito.ai";
.env 파일에서 필요한 정보를 불러와서 사용
3. 파일 STT
POST 파일 전사 요청
1. Binary형식의 file과 Config를 form-data형태로 Body에 담아 서버에 전달
2. Authorization 헤더를 통해 Access Token 전달
3. 이후 서버에서 transcribe_id 반환
2. Authorization 헤더를 통해 Access Token 전달
3. 이후 서버에서 transcribe_id 반환
// utils/index.ts

export const config: ConfigType = {
  use_diarization: true,
  diarization: { spk_count: 1 },
  use_multi_channel: false,
  use_itn: true,
  use_disfluency_filter: true,
  use_profanity_filter: false,
  use_paragraph_splitter: true,
  paragraph_splitter: { max: 50 },
};

export const transcribeFile = async (
  file: express.Multer.File,
  access_token: string | undefined
): Promise<string | undefined> => {
  const form = new FormData();
  form.append("config", JSON.stringify(config));
  form.append("file", fs.createReadStream(file.path));

  try {
    const response = await axios.post(`${API_BASE}/v1/transcribe`, form, {
      headers: {
        ...form.getHeaders(),
        Authorization: `bearer ${access_token}`,
      },
    });
    if (response) {
      return response.data.id;
    }
  } catch (error: any) {
    if (error instanceof AxiosError) {
      console.log(error.message);
    }
  }
};
GET 전사 결과 조회
1. 파일 전사 요청 후 반환받은 transcribe_id를 Get방식으로 서버에 요청하여 결과 조회
2. Polling 방식을 통해 completed status를 반환할 때까지 주기적으로 API 요청
3. results.msg를 배열에 담아 클라이언트에 반환
2. Polling 방식을 통해 completed status를 반환할 때까지 주기적으로 API 요청
3. results.msg를 배열에 담아 클라이언트에 반환
// utils/index.ts

export const getTranscribeResult = async (
  access_token: string | undefined,
  transcribe_id: string | undefined
): Promise<string[] | undefined> => {
  return new Promise((resolve, reject) => {
    const poll = setInterval(async () => {
      try {
        const response = await axios.get(
          `${API_BASE}/v1/transcribe/${transcribe_id}`,
          {
            headers: {
              Authorization: `bearer ${access_token}`,
            },
          }
        );
        const status = response.data.status;
        if (status === "completed") {
          clearInterval(poll);

          const messages = response.data.results.utterances.map(
            (utterance: any) => utterance.msg
          );
          resolve(messages);
        } else if (status === "failed") {
          clearInterval(poll);
          reject("Transcription failed");
        }
      } catch (error: any) {
        clearInterval(poll);
        if (error instanceof AxiosError) {
          console.log(error.message);
        }
        reject(error);
      }
    }, POLLING_INTERVAL);
  });
};
Router 설정
// routes/index.ts

import express from "express";
import multer from "multer";
import { getAccessToken, transcribeFile, getTranscribeResult } from "../utils";

const router = express.Router();
const upload = multer({ dest: "uploads/" });

router.post("/api/transcribe", upload.single("file"), async (req, res) => {
  try {
    const file = req.file;
    if (!file) {
      return res.status(400).send("File is required");
    }

    const access_token = await getAccessToken();
    const transcribe_id = await transcribeFile(file, access_token);
    const result = await getTranscribeResult(access_token, transcribe_id);

    res.send(result);
  } catch (error: any) {
    console.error("Error", error);
    res.status(500).send("Internal Server Error");
  }
});

export default router;
4. 스트리밍 STT
스트리밍 STT 방식에는 gRPC와 WebSocket이 있습니다. 본 튜토리얼에서는 WebSocket 방식을 사용하여 API를 호출하며, 이를 위해 먼저 ws 라이브러리를 설치해야 합니다.
npm intall ws;
Post 파일 전사 요청 및 결과 반환
1. Binary형식의 file과 Config를 form-data형태로 Body에 담아 서버에 전달2. Authorization 헤더를 통해 Access Token 전달
// utils/index.ts

import WebSocket from 'ws';
import { streamConfig } from '../config';

export const streamingTranscribe = async function (
  file: express.Multer.File,
  access_token: string | undefined,
): Promise<string[]> {
  return new Promise((resolve, reject) => {
    let messages: string[] = [];

	// WebSocket 엔드포인트 정의
    const queryString = qs.stringify(streamConfig);
    const streamingEndpoint = `wss://${
      API_BASE.split('://')[1]
    }/v1/transcribe:streaming?${queryString}`;

	// WebSocket 객체 생성
    const ws = new WebSocket(streamingEndpoint, {
      headers: { Authorization: `Bearer ${access_token}` },
    });
	// WebSocket이 연결되면 파일을 읽어서 데이터를 전송
    ws.on('open', () => {
      const fileStream = fs.createReadStream(file.path);
      fileStream.on('data', (chunk: any) => {
        ws.send(chunk);
      });

      fileStream.on('end', () => {
        ws.send('EOS');
      });
    });

	// 서버로부터 메시지를 받으면 JSON으로 파싱하고, 최종 메시지일 경우 배열에 메시지 추가
    ws.on('message', (data: WebSocket.Data) => {
      const msg = JSON.parse(data.toString());
      if (msg.final) {
        messages.push(msg.alternatives[0].text);
      }
    });
	// WebSocket 연결이 종료되면 resolve 함수를 호출하여 메시지 배열을 반환
    ws.on('close', () => {
      resolve(messages);
    });

    ws.on('error', (error) => {
      reject(error);
    });
  });
};
Router 설정
// routes/index.ts

router.post(
  '/api/streamingTranscribe',
  upload.single('file'),
  async (req, res) => {
    try {
      const file = req.file;
      if (!file) {
        return res.status(400).send('File is required');
      }

      const access_token = await getAccessToken();
      if (!access_token) {
        return res.status(401).send('Unable to get access token');
      }

     const result = await streamingTranscribe(file, access_token);

      res.send(result);
    } catch (error: any) {
      console.error('Error', error);
      res.status(500).send('Internal Server Error');
    }
  },
);
// config/index.ts

export const streamConfig: streamConfigType = {
  sample_rate: '48000',
  encoding: 'WAV',
  use_itn: 'true',
  use_disfluency_filter: 'false',
  use_profanity_filter: 'false',
};
5. 최종 결과
실행 방법
// package.json 설정

"scripts": {
    "test": "echo \\"Error: no test specified\\" && exit 1",
    "dev": "nodemon --watch \\"*.ts\\" --exec \\"ts-node\\" app.ts" // 추가
  },
npm run dev실행 결과
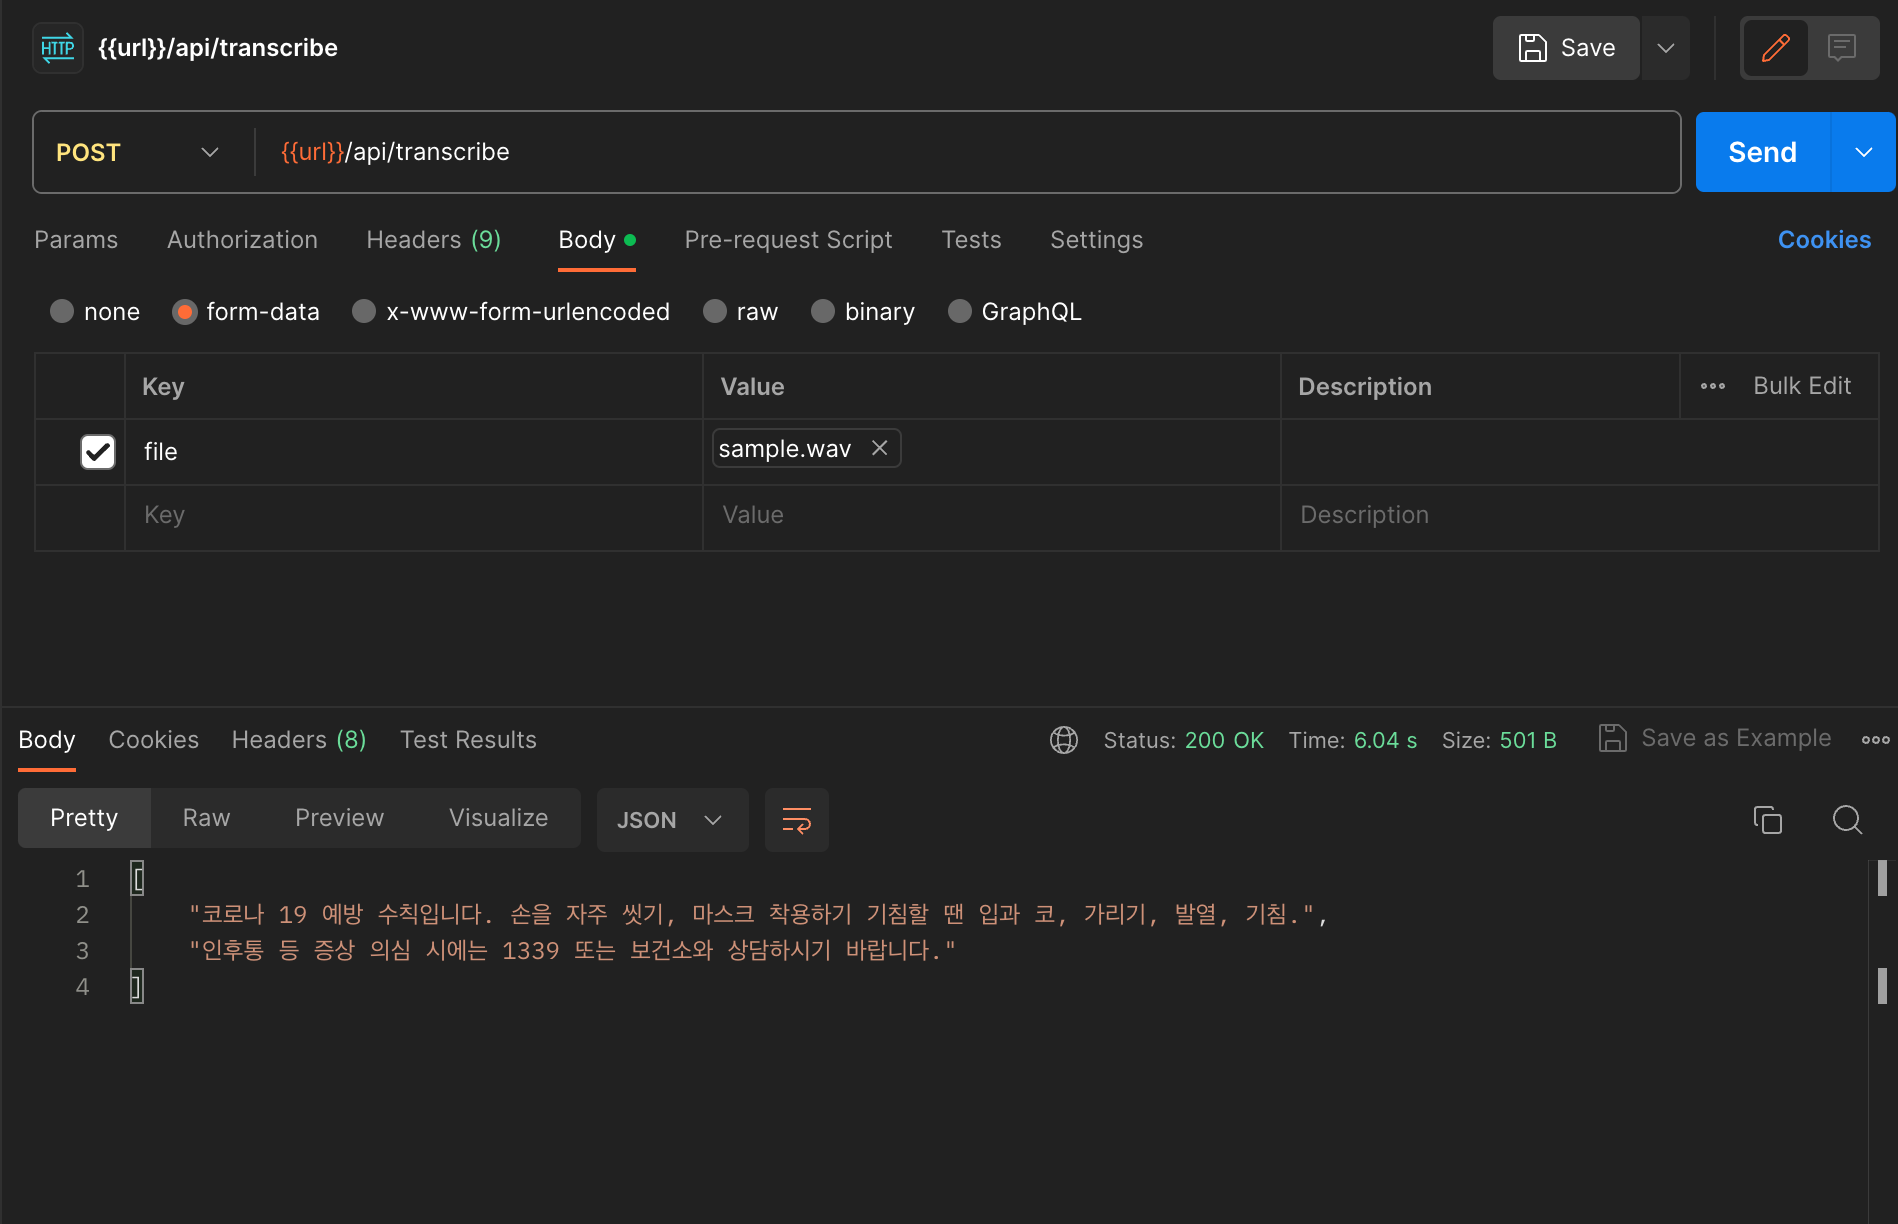
일반 STT
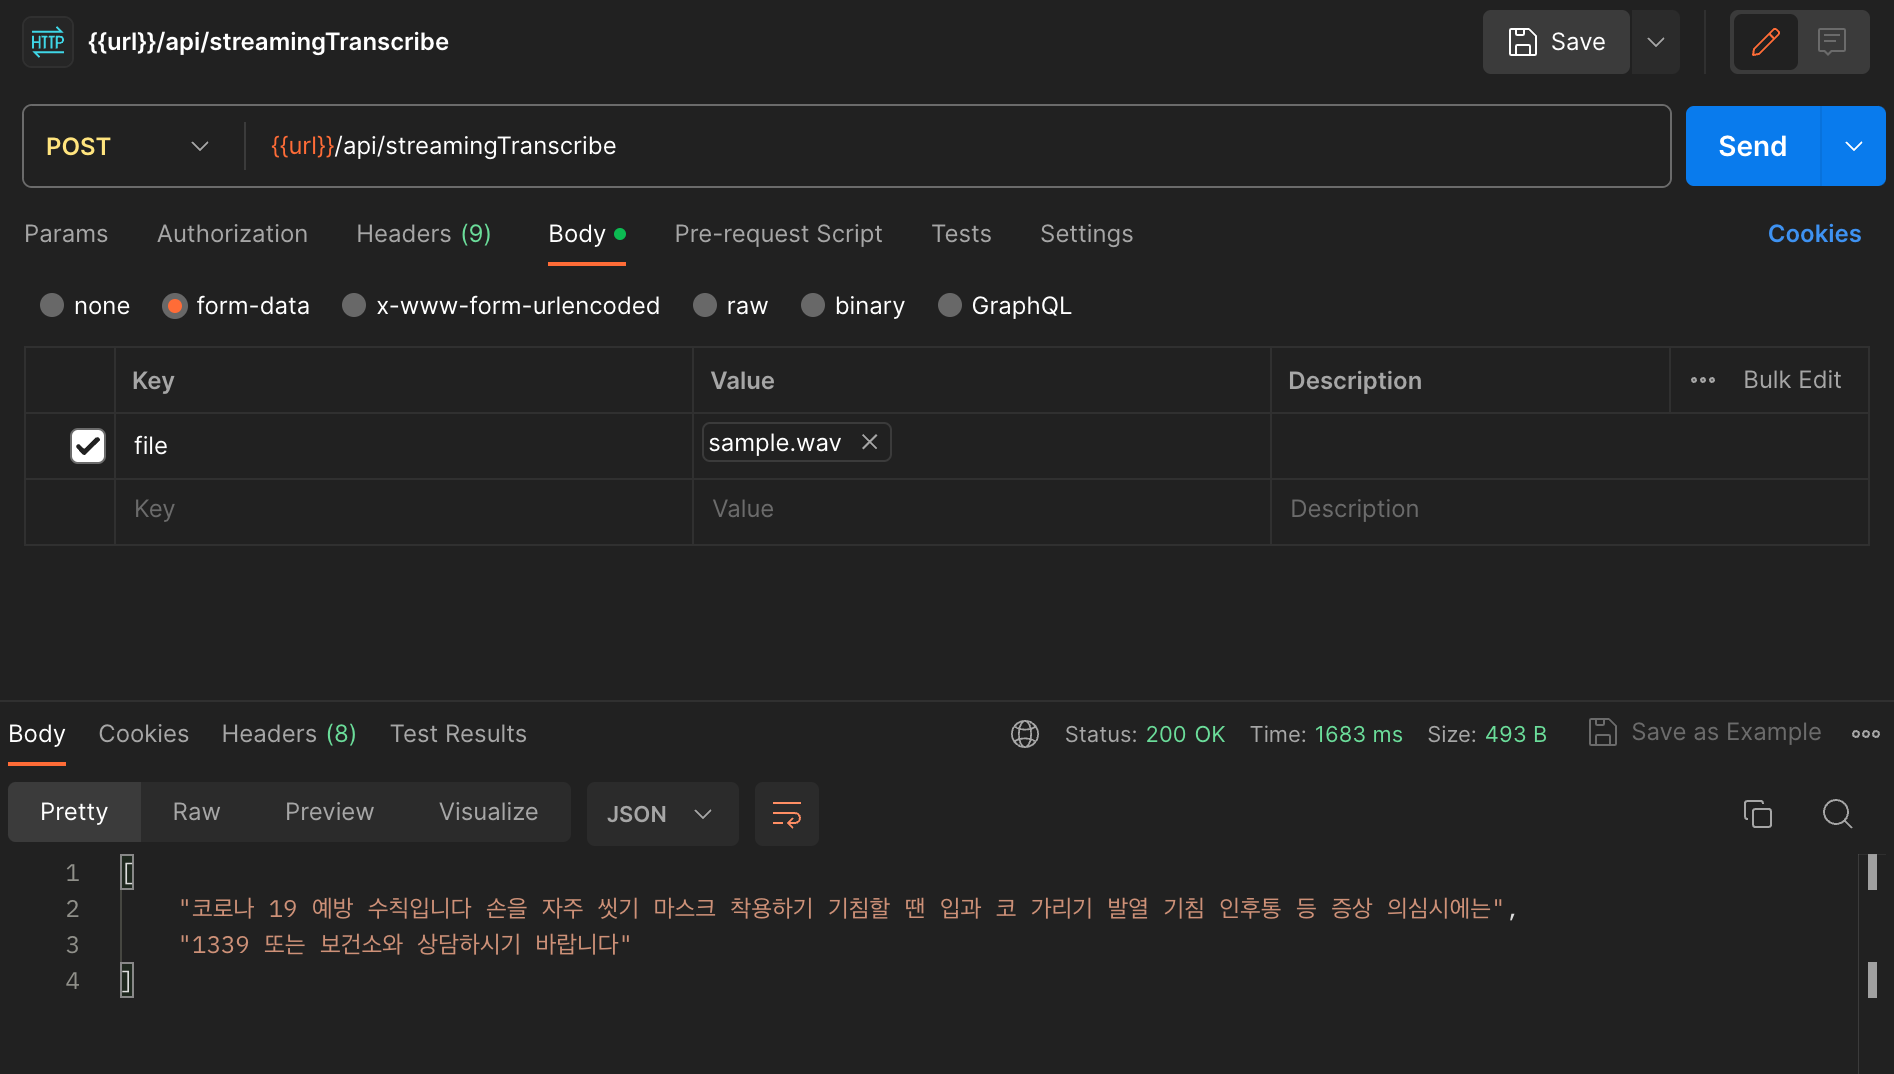
스트리밍STT
샘플 음성파일
https://blog.naver.com/adsound_rec/221835489818
디렉토리 구조
node-server
├─ .prettierrc
├─ README.md
├─ app.ts
├─ config
│  └─ index.ts
├─ package-lock.json
├─ package.json
├─ routes
│  └─ index.ts
├─ tsconfig.json
├─ types
│  └─ index.ts
└─ utils
   └─ index.ts


